In today's world technology and the internet is spreading across the globe. A study reveals that- there are 5.22 billion unique mobile phone users in the world today, and it is increasing day by day. With the increase in the usage of technology and the internet, there is a bigger opportunity to reach the global customer through your website and app.

Website localization is the process of adapting the local language to the website. But, It does not only mean a simple translation of the text. It is also the process of adapting different linguistic and cultural context too.
Why should we use Localization?
Localization adds cultural and trust elements. It helps in building a brand and reaching the global audience. It breaks the barrier of language and culture for potential customers. You can target local markets and increases your customer base.
Implementation of localization in React
In this article, I will explain the simplest way of implementing localization in React using react-localization npm module. Follow the
react localization tutorial step by step. After reading this tutorial, you will be confident enough to add localization in you react app.
You can see the working demo here - Demo

Localization using react-localization
First of all, create a new react app. You can also use react code sandbox - a online editor. Alternatively, you can use use CRA (create-react-app). Below is the command for creating a starter react project with CRA (Create react App).
    npx create-react-app my-app
    cd my-app
    npm start
Now you need to install react-localization npm module.
    yarn add react-localization
    OR
    npm install react-localization
Now, Create a localization directory under src. Create different locale files with translations. For example- let's target English,
french, german, Italian and Russian. These files will contain the translations.
- src
- localization
- en.js
- fr.js
- de.js
- ru.js
- it.js
- localization
Keep some dummy translated data (from below code) to your localized files. Copy the respective translation data to your respective files. Finally, export all the translation files combinning into one.
    //en.js
    export default {
        name: "Name",
        age: "Age",
        address: "Address",
        contactNo: "Contact No"
    };
    //fr.js
    export default {
        name: "Nom",
        age: "Âge",
        address: "Adresse",
        contactNo: "Numéro de contact",
    };
    //de.js (German)
    {
       name: "Name",
       age: "Alter",
       address: "Adresse",
       contactNo: "Kontakt Nummer",
    }
    //it.js
    export default {
      name: "Nome",
      age: "Età",
      address: "Indirizzo",
      contactNo: "Numero di contatto",
    }
    //ru.js
    export default {
      name: "имя",
      age: "возраст",
      address: "адрес",
      contactNo: "Контактный телефон",
    }

    //index.js
    import en from "en";
    import fr from "fr";
    import de from "de";
    import it from "it";
    import ru from "ru";
    export default {
    	en,
        fr,
        de,
        it,
        ru
    }
Localization - By using Class based compoent
Now, import LocalizedStrings from react-lcalization to your app.js file, import localizations
data from localization directory. Pass the localizations to new LocalizedStrings(localizations);, which will return
an object (check line no- 5). Later on we can use this object to call setLanguage method to change the language (check line no - 25).
Localization - By using functional compoent
Advance Localization Concept
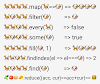
Sometimes you need to pass a dynamic value to your localized string. If so, then it is possible with formatString().
You can use formatString() - to format the passed string replacing its placeholders with the other arguments strings.
Further, update your localized files with info and randomValue keys. Info has 3 placeholder which we change from JSX code. randomValue accepts an argument called random which we can pass from JSX.
    //en.js
    {
        info:"3 important city of {0} - {1} and {2}",
        randomValue: "Random value- {random}",
        ...
    }
    //ru.js
    {
        info: "3 важных города {0} - {1} and {2}",
        randomValue: "Случайное значение- {random}",
        ...
    }
    //fr.js
    {
        info: "3 ville importante de {0} - {1}, {2} and {3}",
        randomValue: "Valeur aléatoire- {random}",
        ...
    }
    //it.js
    {
        info: "3 ville importante de {0} - {1}, {2} and {3}",
        randomValue: "Valore casuale- {random}",
        ...
    }
    //de.js
    {
        info: "3 wichtige Stadt von Deutschlands - a, b und c",
        randomValue: "Zufälliger Wert- {random}",

        ...
    }
Now, you use it from your JSX code like-
    return  (
      ...
      ...
      <div> INFO: {translations.formatString(translations.info, "UK", "London", "", "")} </div>
      <div> Random Value: { translations.formatString(translations.randomValue, {random: Math.radom() }) } </div>
      ...
    )
translations.formatString(translations.info, "Russia", "Mascow", "Saint Petersburg", "Novosibirsk")}
translations.formatString(translations.info, "France", "Paris", "Lyon", "Toulouse")
translations.formatString(translations.info, "Italy", "Rome", "Milan", "Naples")
translations.formatString(translations.info, "Germany", "Berlin", "hamburg", "Munich")
If you want to pass an HTML element OR localized string as a placeholder, it is possible.
    //en.js
    {
      ...
      para:"some random paragraph.  {0}",
      readmore: "Read More",
      ...
    }

    //passing an HTML element as placeholder
    translations.formatString(translations.para, <a href="http://gotothissite.com">READ MORE</a>)
    OR
    translations.formatString(translations.para, <a href="http://gotothissite.com">{translations.readmore}</a>)
Advance React localization example
Above example is the simplest way to implement localization in react. You can refactor this code and use Context api and custom hooks to make it globally available to all the components. Check the code below.
You can check the DEMO code here (Working code of the DEMO)- Advance React localization example


0 Comments